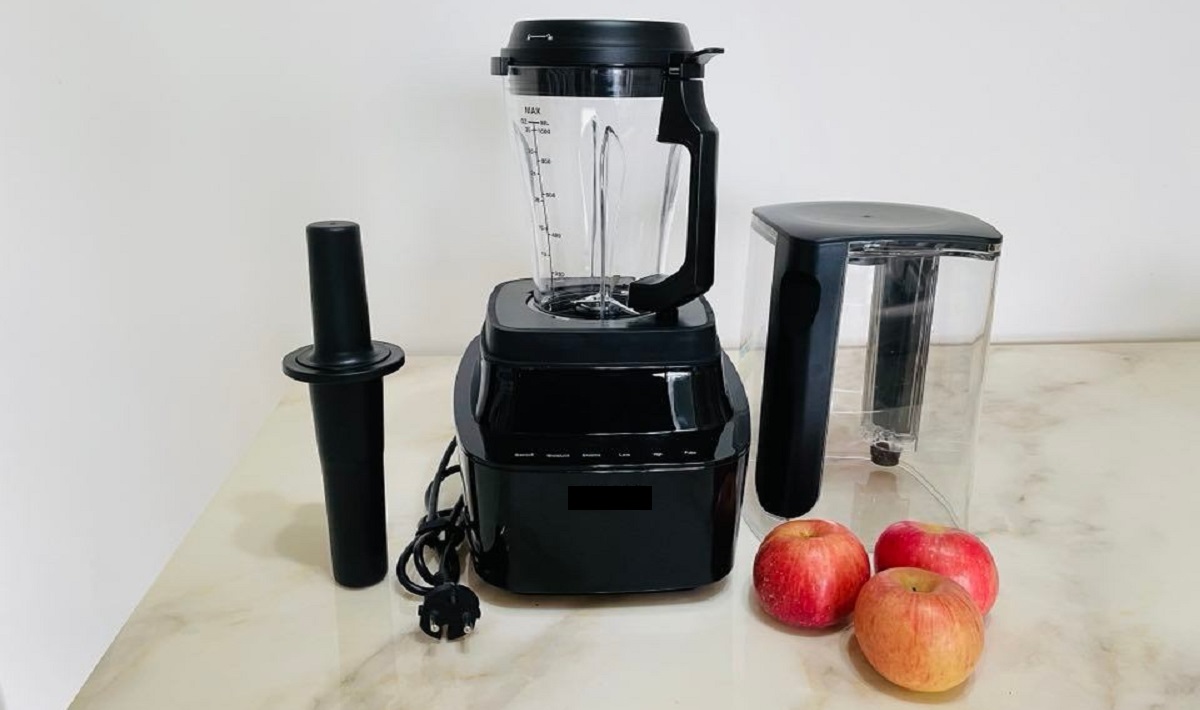
This machine is not your typical normal table blender or smoothie maker that most likely you’re very familiar with. Vacuum Blenders may look similar, but they’re different functionality-wise.
I’m sure you heard about table blenders, mini or personal blenders, or smoothie makers… but what about Vacuum Blenders?
Please allow me to walk you through what is a vacuum blender and how it differs from the normal or common types of blenders.
What is a Vacuum Blender?
A Vacuum Blender is a type of blender that vacuums the air or suck the air out of the blending jar first before it starts blending operation. I have mentioned this in my previous article about SDA.
Removing the air inside the blending jar allows the blended smoothie or shake to retain its freshness and nutrition as vacuuming air prevents oxidation.
But it has to be noted that there are many different designs of vacuum blenders.
Some may have built-in pumps, and others may have an external pump as an accessory.
Trivia: 1) Did you know that the first vacuum blender with 290W power was introduced in 2013? Yes, and it was first introduced in Japan by a company named Tescom. Then more companies had followed suit until this day, where more models are now available to choose from and with higher power (e.g. 1000W) and other added features such as noise reduction cover for silent type vacuum blenders. 2) Going back further when the blender was first invented was in 1922, by Stephen Poplawski.
How “vacuum” is defined
According to britannica.com, a vacuum is a space in which the pressure is so low that any particles in the space do not affect any processes being carried on there… and that a vacuum can be created by removing air from space using a vacuum pump.
- Applying the principle to a vacuum blender… when the air is removed inside the container, oxidation (caused by the presence of air) will no longer affect the blending process because the space (blending jar) has been vacuumed (freed up of air).
- Let’s find out if the pump is included as one of the parts of a vacuum blender.
- Depending on the design, a pump might be supplied as an accessory.
Main parts of a Vacuum Blender
To understand more about what is a vacuum blender, let’s find out what are its main parts.
In this article, I will be showing a silent type of vacuum blender that has a built-in pump and also comes with a noise reduction cover.
So, this is a Silent Vacuum Power Blender.
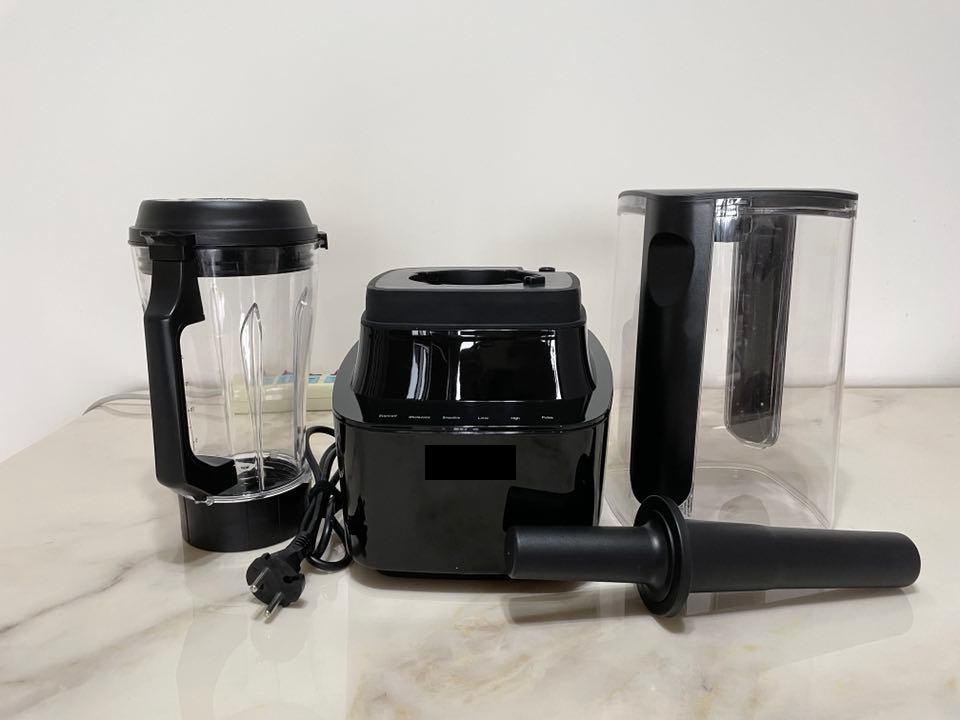
This is my vacuum blender sample that I will be showing its parts. Vacuum blender designs differ from brand to brand, but they all have similar components.
This particular model has this specification:
- Product name: Silent Vacuum Power Blender
- Rated Voltage/Freq: 220-240V, 50/60Hz
- Power: 1000W
- Blending jar capacity: 1.0L
- Blending jar material: BPA free, Tritan material
- Continuous working time: < 3minutes
Now, let’s take a look at the major parts illustrated below:
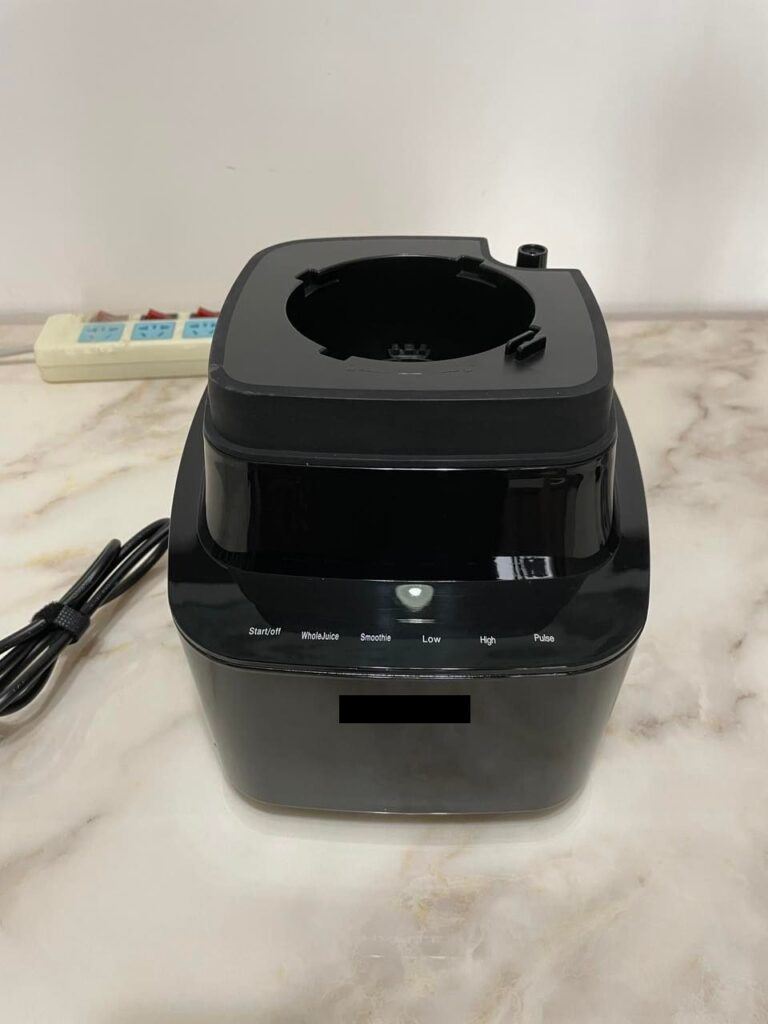
Base overview
This is the vacuum blender’s base where motors are enclosed.
The control panel and display are also attached to the base.
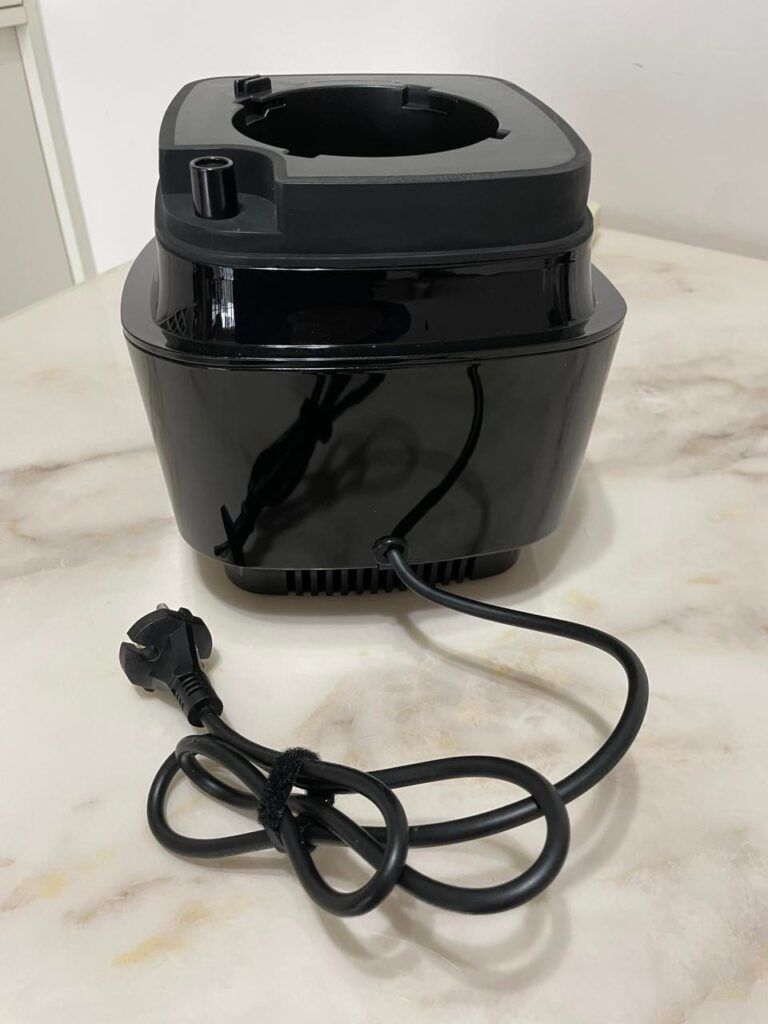
Rear side of Base
The vacuum blender’s rear side of the base is where the AC cord set is attached.
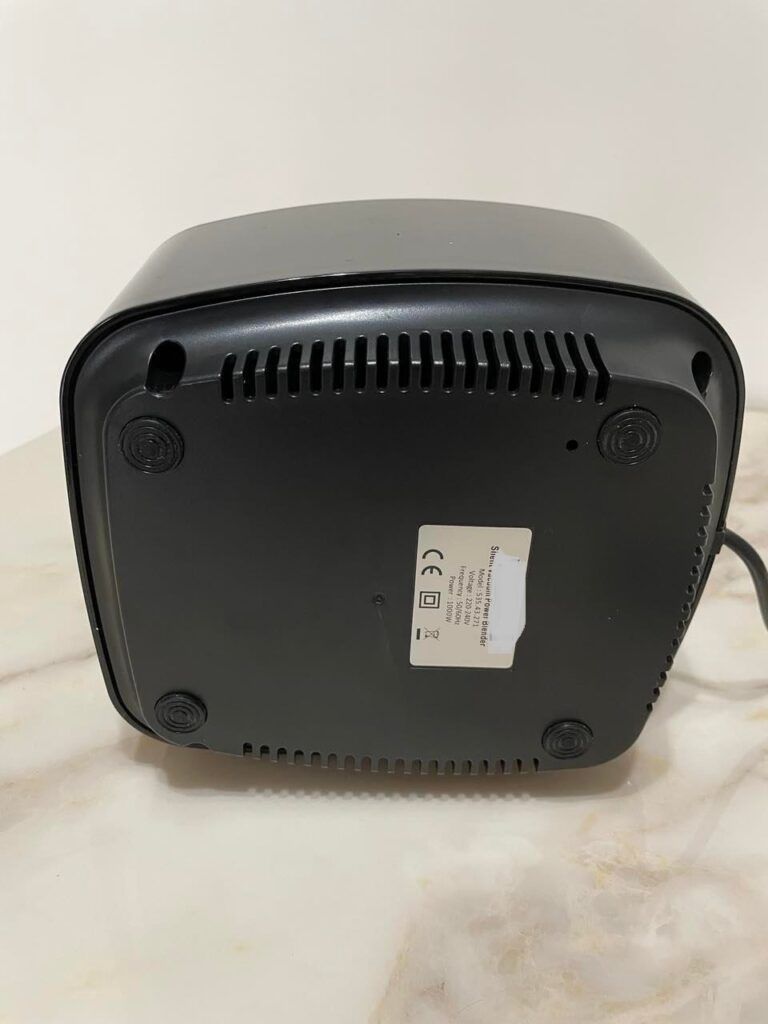
Bottom side of Base
The vacuum blender’s bottom side of the base is where you will find the rating label bearing the information of the product.
Also, you will find the four non-slip rubber feet.
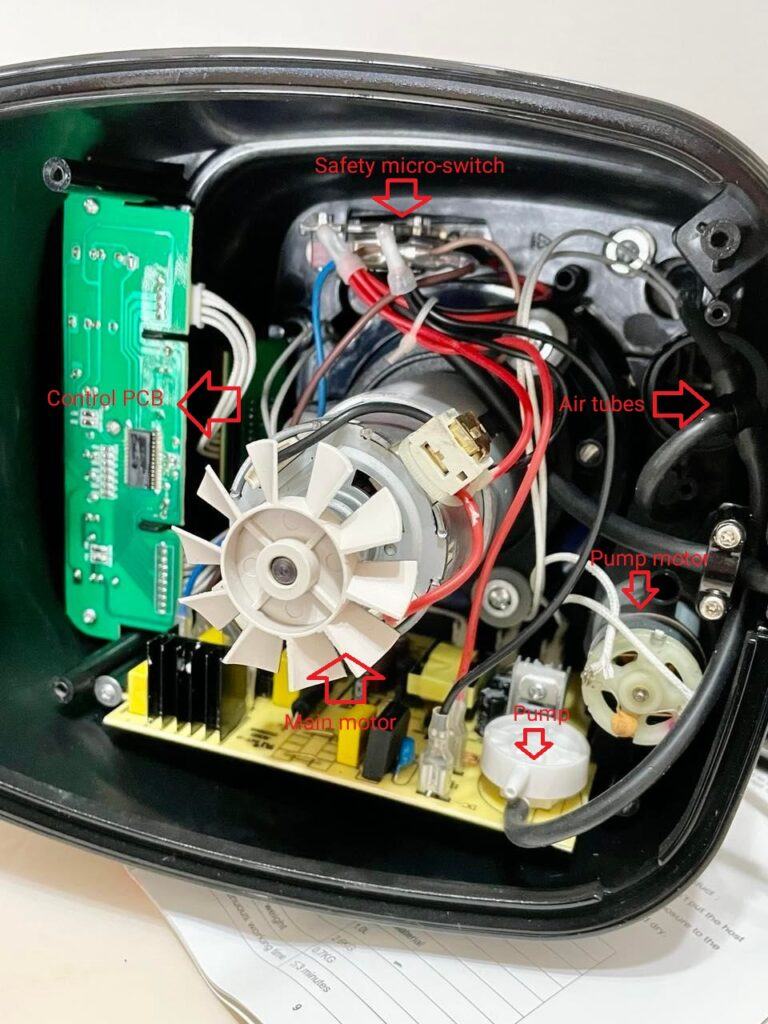
Inside construction of Base
The inside construction of the vacuum blender shows the major internal components such as the main motor, pump and pump motor, air tubes, safety switch, and the control PCB.
The addition of an air pump and pump motor in the design is what makes the vacuum blender different from normal blenders.
Note: Normal blenders only have one motor – the main motor.
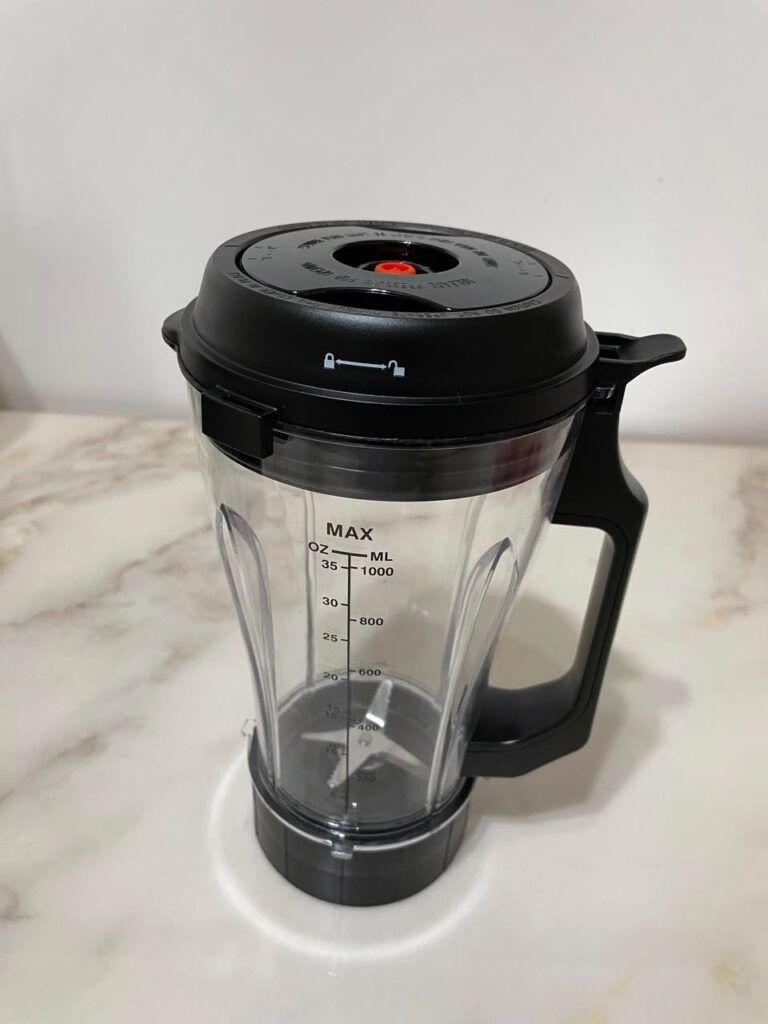
Blending Jar
This is the vacuum blender’s complete assembly of the blending jar.
This is where you put all the ingredients you want to blend.
Always check the instruction manual about the correct orientation of the lid. It must be positioned correctly for it to lock properly!
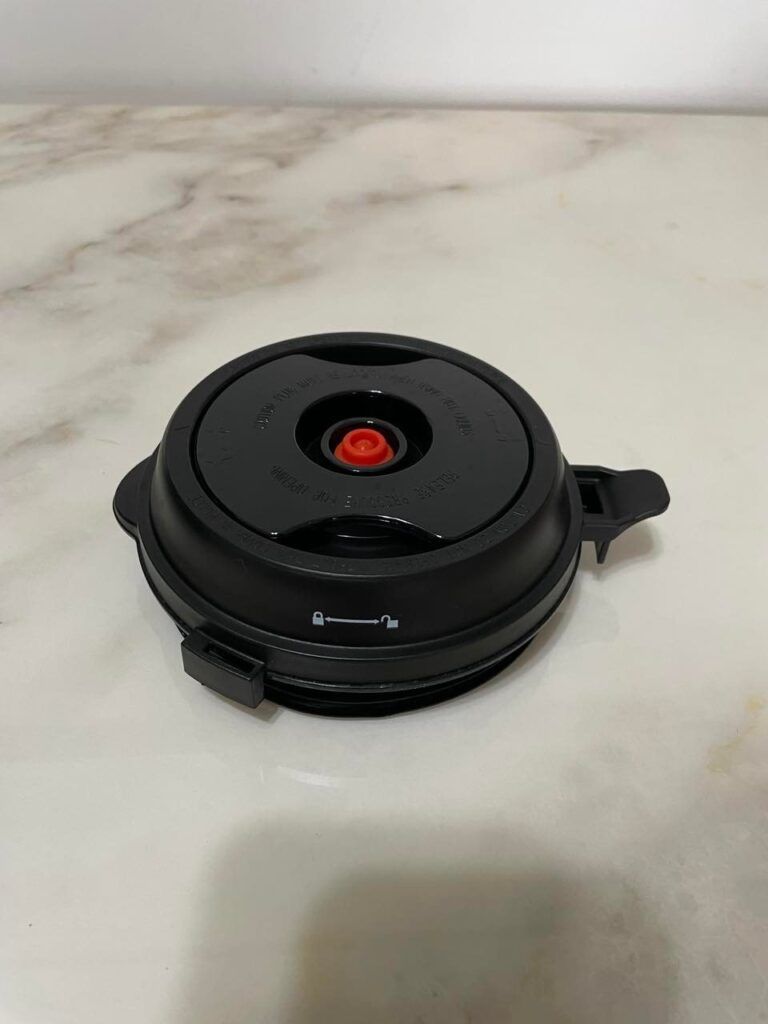
Lid Cover
This is the lid cover assembly.
It prevents the ingredients from overflowing during the blending process.
When installing the lid to the blending jar, you must follow the correct orientation. It must be positioned correctly for it to lock properly!
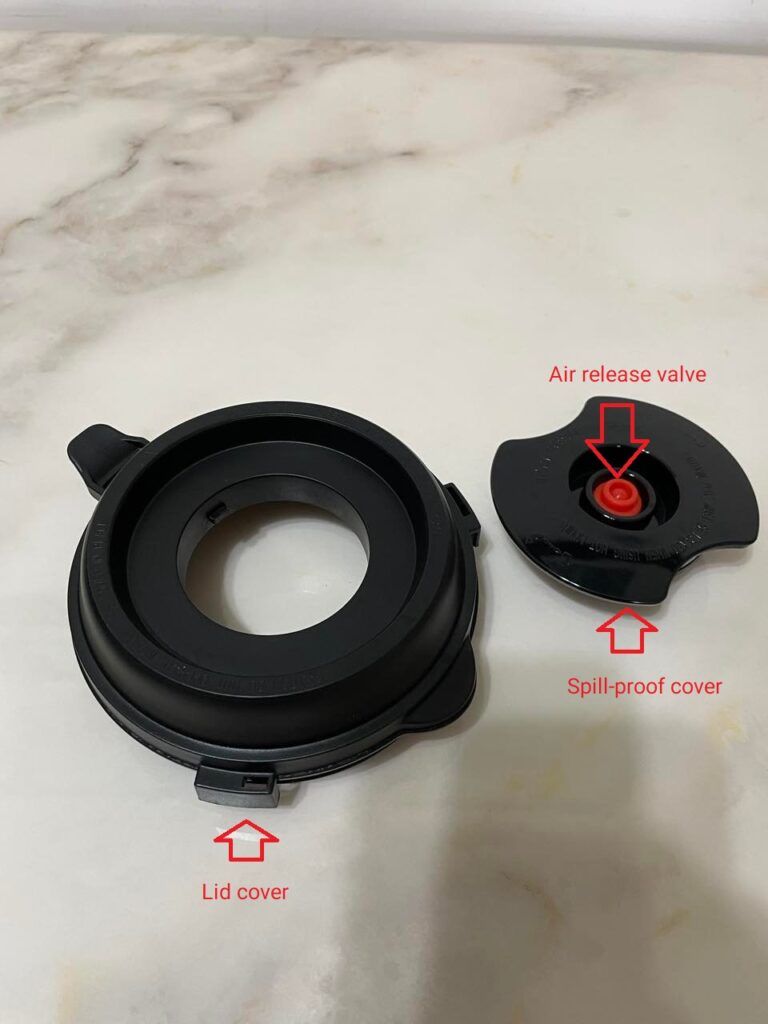
Lid cover components
The lid cover is to make sure liquid does not overflow. While the hole at the center is for the pusher to be inserted when needed during blending to push some ingredients that are stuck on the wall.
The red part is the air release valve. This is utilized during the unit is in a vacuum state, where the air is sucked out and released by the pump.
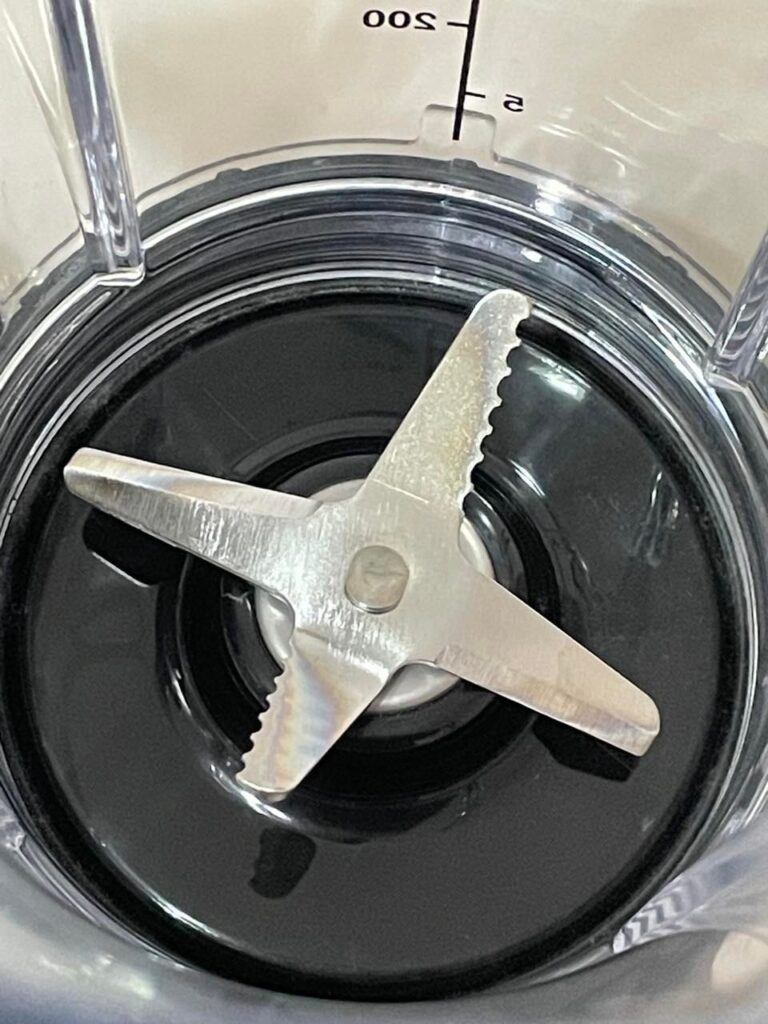
Blade assembly
The blade assembly can be detached from the jar if needed.
The blade is used to mince the ingredients that you are blending.
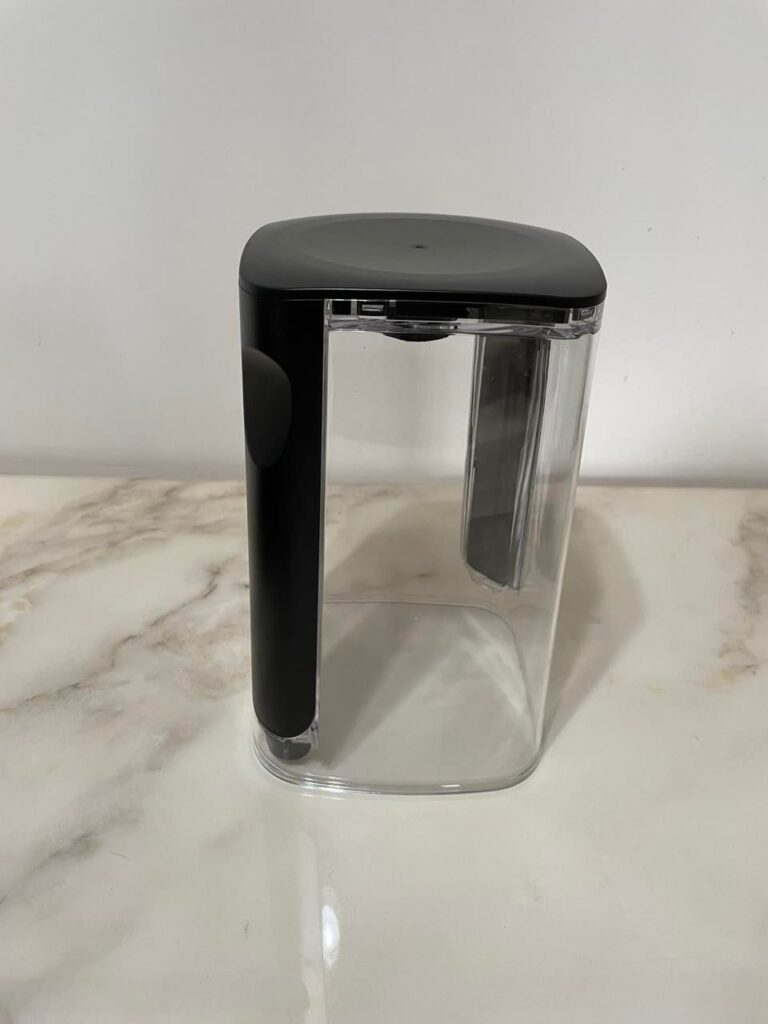
Noise reduction cover
The noise reduction cover needs to be installed during operation to reduce blending noise and also to activate the vacuum function
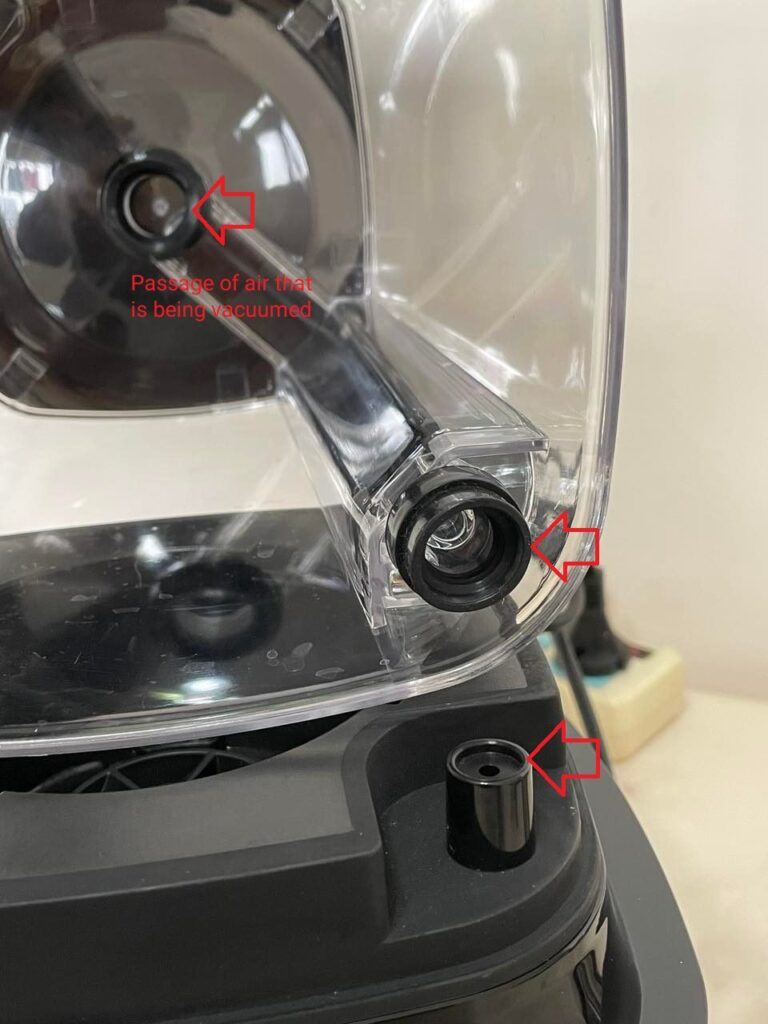
Air passage
The is the passage of air that is being vacuumed.
From the air release valve on the lid, the air is sucked out through the noise reduction cover and then to the air tube on the base where the pump air tubes are connected.
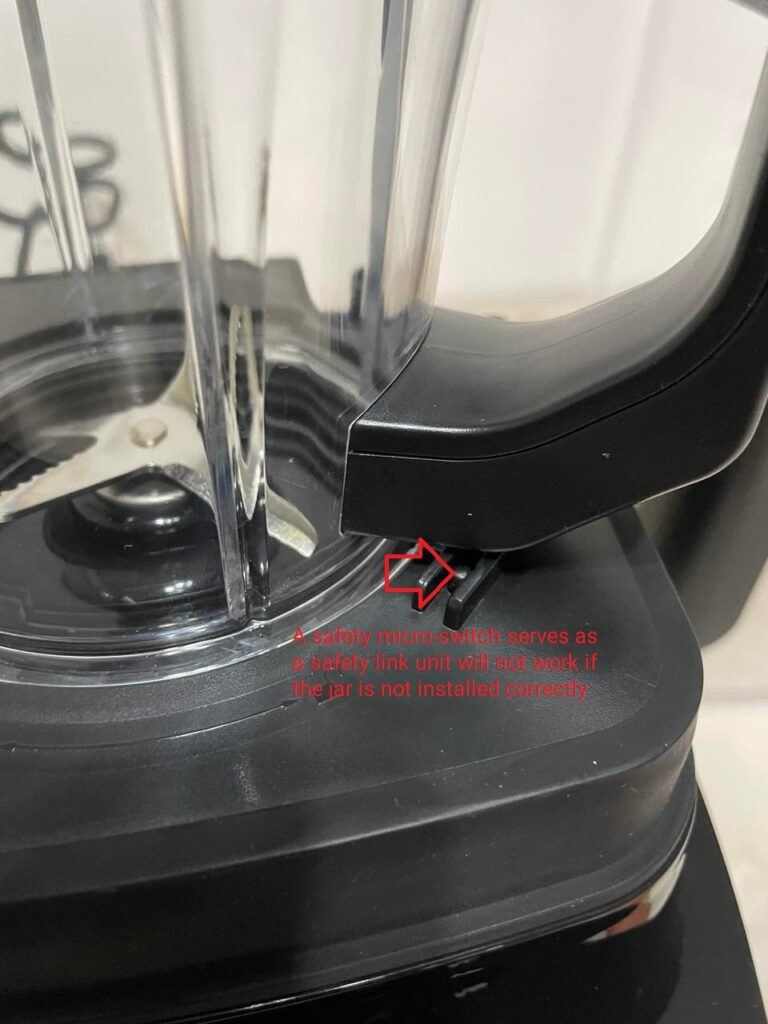
Safety switch
The safety switch serves as the safety link to ensure that the unit does not function if the blending jar is installed wrongly.
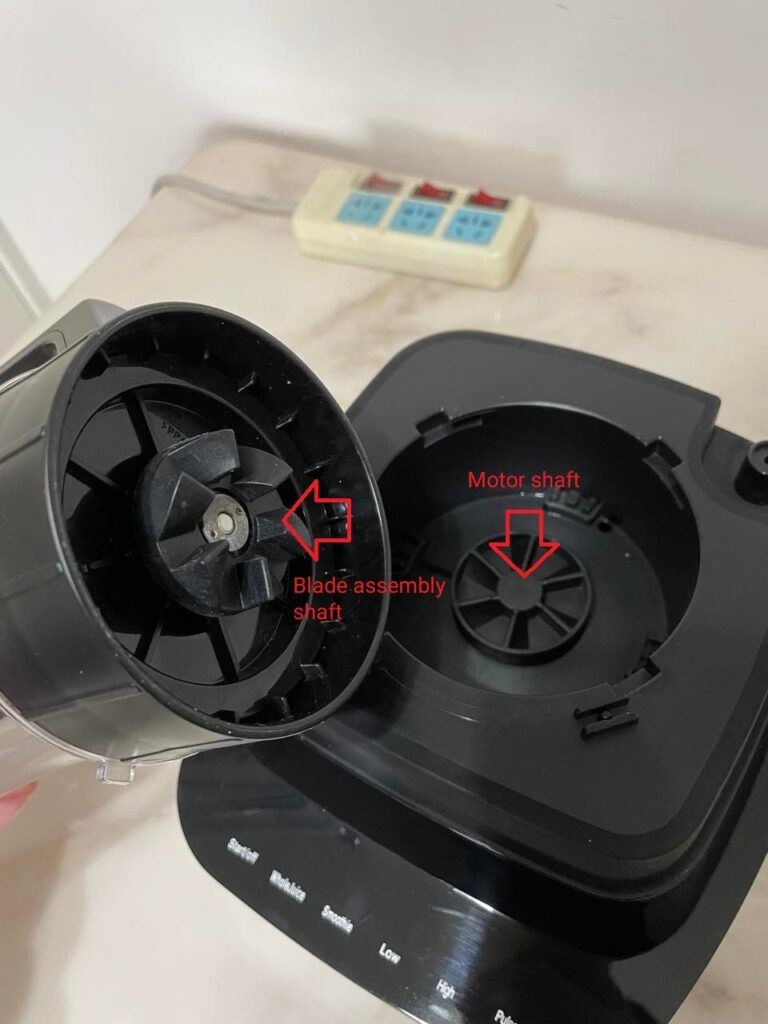
Blade and motor shaft
When installing the blender jar to the base you must make sure that the shafts are locked-in.
Taking into consideration the correct position of the blender jar so that the safety switch is activated for the unit to function.
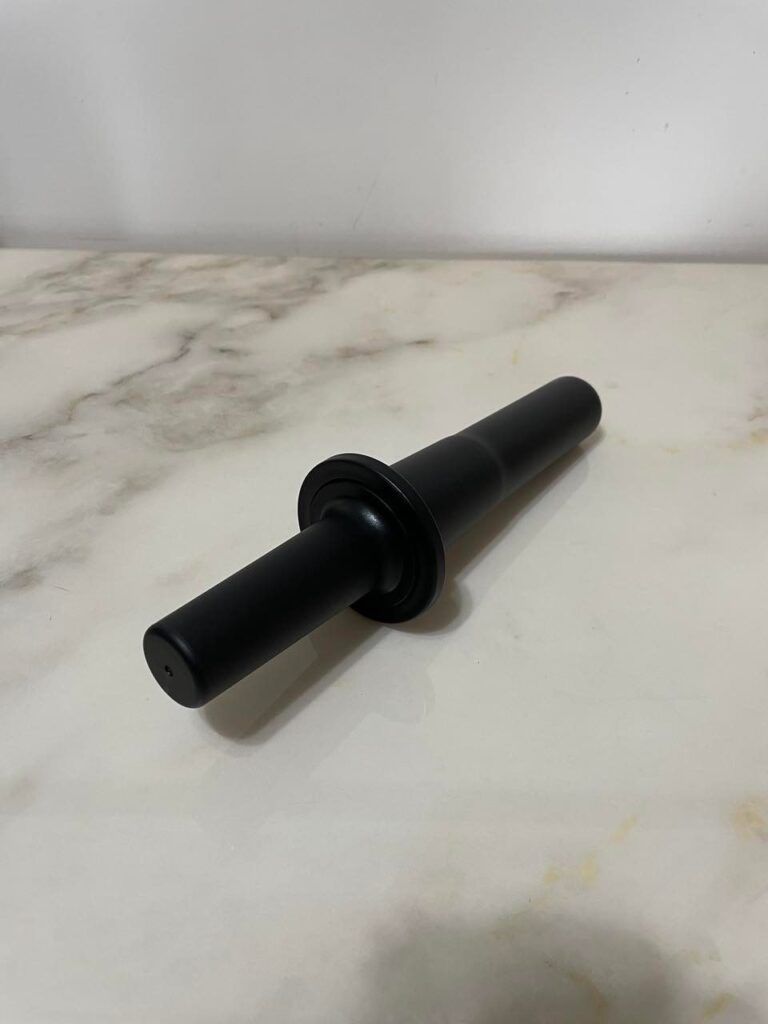
Pusher
This is an accessory that is used to push ingredients that are stuck on the wall.
It may not be included in some models or other brands of vacuum blenders.
Actual Smoothie Blending
Let’s do actual vacuum blending…
I used apples and low-fat yogurt as my main ingredients for this test… nothing else.
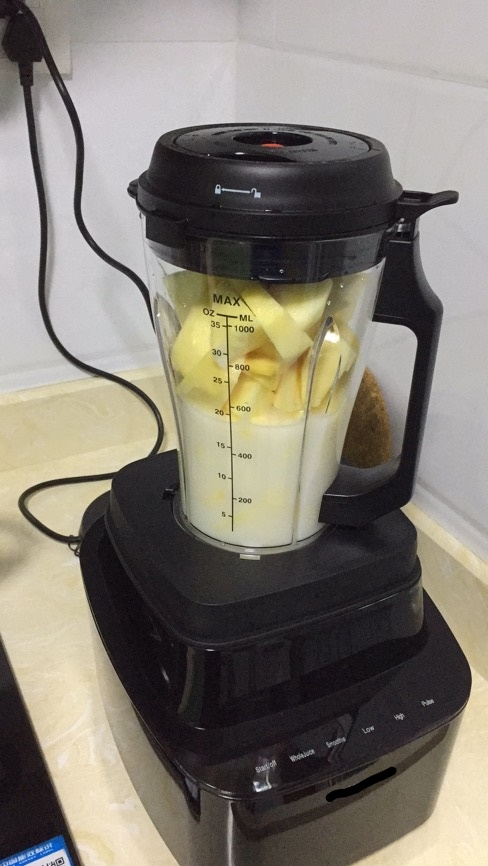
Installing blending jar to the base
After you have prepared all the ingredients, place them inside the blending jar.
Make sure that you have followed and checked the instruction manual how to install the blending jar to the base.
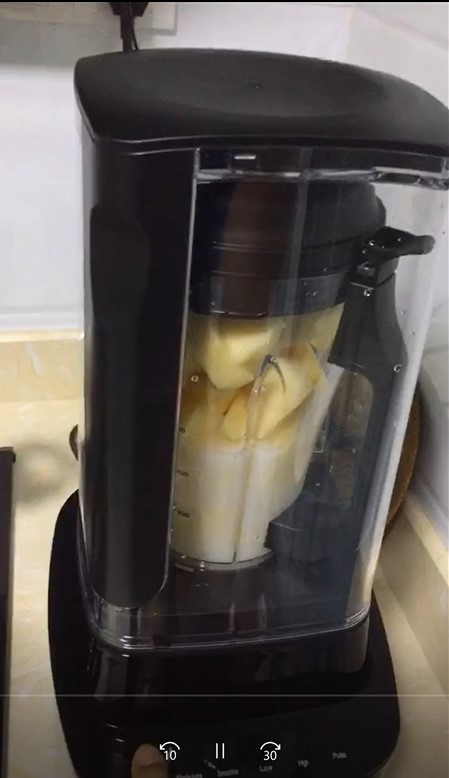
Installing the noise reduction cover
Make sure of the correct position in installing the noise reduction cover. For this model, the air passage must be in the correct location of the base for the vacuuming to function.
Always refer to the instruction manual when necessary.
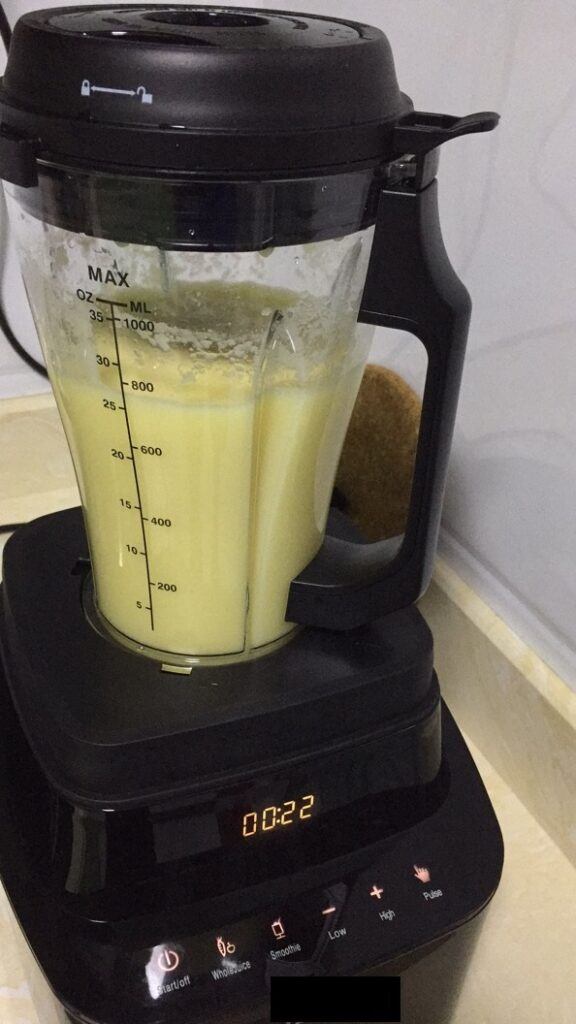
The finished blended apple smoothie
The actual texture of the apple shake is fine and smooth, and there were not too many bubbles which are very common when using a normal blender.
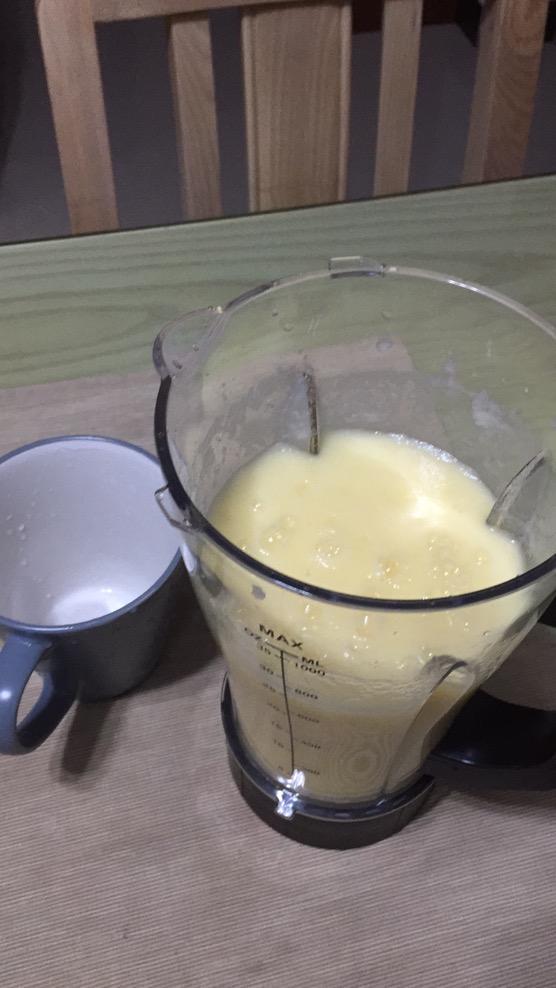
The finished product
The texture of the apple smoothie is fine and as you may observe it has fewer bubbles.
And as mentioned above vacuum blending will retain its freshness and nutrients.
It was also observed that the smoothie did not turn its color very quickly… it took some time before the color changed.
How does a vacuum blender work?
As pointed out above, a vacuum blender will first remove the air inside the blending jar by pumping the air out before the blender starts blending operation.
In my previous article about Alternative Healthy Kitchen Appliance I have shown the resulting effect of a vacuum blender.
For the benefit of our readers, I am showing again the said reference image…
… left side is by normal blending and the one on the right side is by vacuum blending.

Based on the above illustration, you’ll easily spot the difference between normal and vacuum blending.
Is vacuum blender better?
A vacuum blender is better compared to a normal blender because as already noted, it retains the freshness and nutrients of the ingredients.
A vacuum blender prevents oxidation that can degrade nutrients from all the ingredients.
There are already many comparisons that have been done that prove vacuum blenders are better than a normal blenders.
If you are on a blender diet and you want to make the most out of your smoothie recipes, then a vacuum blender will be your best bet.
Final Thoughts
Since its first introduction in 2013, Vacuum Blenders have grown tremendously and gained instant popularity in the health and wellness sector.
To date, more and more people are turning to vacuum blenders… especially those who are on strict diets… because of the health benefits a vacuum blender offers.
So there you have it, we’ve been able to establish and define what is a vacuum blender.
Moreover, we have identified its main parts and have isolated the part that makes it different from the common blenders… and that is the integration of the air pump and the pump motor into its design. While for other designs, the pump may come as an accessory.
There have been so many comparisons already done to prove a vacuum blender’s worth.
It is all up to you to decide which one will suit your need… a vacuum blender or just a normal one.
If you find this article helpful, or if you have questions or suggestions, please leave a comment below. I will make sure to answer them as soon as I can to the best of my knowledge.
Once again, thank you for reading!
